Thursday, August 23, 2012

Toilet Paper Roll Art!!


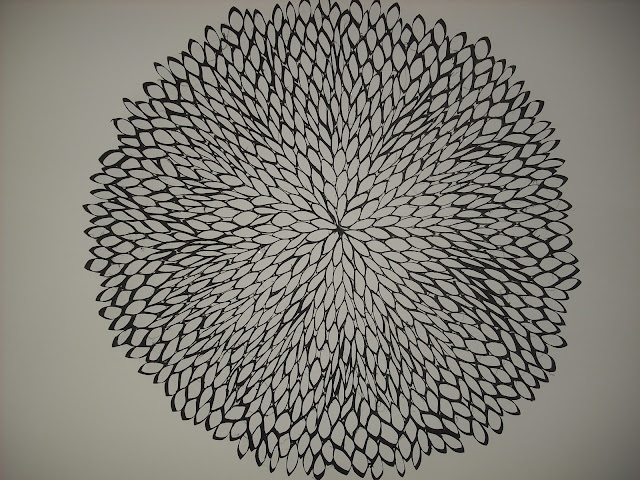
Taaa-daaa!! Toilet paper roll art! Here's how to make it:

Things you'll need:
- lots and lots and LOTS of empty toilet paper/paper towel rolls
- scissors
- hot glue gun
- spray paint
(this project is super cheap to make! I got the spray paint at Lowe's for 99 cents a can!)

Step 1: Collect empty rolls. You're gonna need a sh*t ton. This process will probably take you awhile to collect enough. Ask your friends to save you their empty rolls!

Step 2: Flatten the rolls, and then use a ruler to mark off one inch segments (or whatever size you want - one inch just seemed easiest to me). The cut along your lines.
Step 3: Start hot gluing the pieces together,
And make a flower shape for the center:

Step 4: Keep adding pieces to the spaces around the flower.
And adding
 And adding
I started out with this shape, but then I decided I wanted to fill it all in so it was more of a circle
Anyways, long story short, I got entirely carried away and kept adding and adding pieces trying to make it a perfectly symmetrical circle. (I'm nuts, I know). Feel free to make this on a much smaller scale. I finally had to stop myself when the darn thing measured at least 40" in diameter all the way around.....

Step 5: Time for spray painting! You'll also need a lot of spray paint (depending on how large you make it, obviously. But also because the rolls are absorbent.) It took me 4 cans. I did it in flat black because I was going for sort of an iron look....

I hung it up over my bed by hammering a bunch of small nails into the wall and then just kind of sitting it on the nails.... it's holding so far! ;)

Happy crafting! :)
Friday, May 11, 2012

Crayon Art!


Okay, so I have seen a few of these online, and I wanted to give it a try myself. I posted this here for you guys, so you can learn from my trials and errors! :)


Things you'll need:
- a nice new box of crayons (I went with a box of 96)
- a canvas (mine is 16 x 20 inches, bought at Michael's for around $10)
- hot glue gun
- a blowdryer


Step 1: Sort out your crayons. I began by separating mine by color.


The top right pile is my "reject pile," I didn't want any browns in mine!


Step 2: Figure out how you want the color progression to go.
This step became complicated for me as I tried to have the color changes be gradual and blend. I ended up doing something like this (because I'm completely out of my mind).....
  
and then line them up against your canvas to get an idea of how many crayons you'll need.


Step 3: Now comes the fun of removing the wrappers! You don't have to remove them, if you don't want to, I have seen plenty of versions where the wrappers are left on. But if you like to make things more complicated (like me!) and take them off, you don't have to peel them all by hand. I read online that you can put them in a bucket of water and then the wrappers peel right off. However, I had already carefully lined mine up by color and I didn't want to lose that by putting them all into a bucket. So, instead, I used a box cutter to slice the wrappers off.


Most of the wrappers came right off. Most. Be warned that some of the wrappers seem to be glued on... and removing those one can be a struggle. Also, be careful not to use too much pressure and slice parts of the crayons off (I lost a few crayons this way).


Step 4: Start gluing the crayons on!

So, I realized as I went that removing the wrappers made each crayon take up slightlyyyyy less room, and at the end, I needed more crayons! So I wouldn't suggest gluing until you have them all lined up and are sure they fit! I used 61 crayons in total. And they didn't quite fit perfectly. (Notice the slice spacing in the middle.) Oh well, c'est la vie.
Also, be careful because the hot glue melts the crayons (obviously) so you have to get them on in place quickly.


Step 5: Now the real fun begins! I had read online that a blowdryer will cause the wax to splatter, and I was really hoping for a dripping effect, rather than a splattering. I decided to try using a diffuser on my blowdryer and it worked really well!


So I just held the blowdryer (on high heat) over each section for awhile. It takes a few minutes for the crayons to start "sweating," but once they start to melt, they really get going!


And that's it! What I really love about this is that there's really no "right way" to do this. I played around with moving the blowdryer to different areas of the crayon, and also melting the wax directly that had dripped down. I recommend doing this outside, if you can, because the crayons on the edges did end up splattering onto my balcony a bit. Good news is that you can scrape the wax right off (except for my carpet... which I'm still figuring out how to address... oops :/). I ended up melting the wax for a second time, the next day, and I think it gave it more of a textured effect. I also used a Q-tip to help fix the crayons at the top that had ran together too much for my liking. 

Happy Melting!! :)

Wednesday, February 8, 2012

DIY Valentine's Day Wreath!! :)

Hello everyone!


As I mentioned in my last post, I have a utility closet in my apartment. It's right in the kitchen and looks very bare, so I have begun making a wreath for every holiday to decorate it! I made a Christmas one, but I didn't get a chance to blog about it, so maybe you'll get to see that one next year ;)


So here it is, a do-it-yourself Valentine's Day wreath!.....


Things you'll need:
- a Styrofoam wreath (mine is 12" and I got it at Michael's. I was actually hoping for a heart shaped one, but no luck there).
- felt (I bought a yard each of red, hot pink, and light pink felt; I ended up with way more than I needed - half a yard of each would have sufficed).
- sewing pins


Step 1: Create a template to trace out of cardboard or heavy paper. This cup I'm using is 4 inches across.
Step 2: Once you have your template,
Start cutting circles out of the felt (I used a white crayon to trace the shape... chalk would probably be better, but I didn't have any)
Step 3: Once you have a good amount of felt circles (WARNING: you will need a lot!! I used 68 in total. And yes, I did count for your benefit!),
You can start to pin them onto the wreath. To do this, you're going to take each circle, fold it in half, and then in half again, like so:
And then stick the straight pin through the area of the felt that comes to a point, and into the Styrofoam
Step 4: As you pin them on, you kind of want to open up the folds, so they spread out and look more like flower petals
Keep going....
Don't forget to do the sides/top/bottom as well as the front!
Once it's all filled in... taaa daaaa!!! That's it! Don't be afraid to pull and manipulate the felt to get it to look how you want, it's sturdier than you think! 


Happy crafting! :) 

Followers